I also have a tendency to collect crafting supplies. Sometimes it's from garage sales, and sometimes it's from my mother. Every so often she clears out her crafting hoard and if she offers it in my direction I snag it up. This has saved me lots of money. I always try and use what I have on hand before I go out and buy anything.
That's how this came about.
This is my tree angel. I have had it for about 5 or 6 years now. I had some old vintage looking lace (from my mother) and wired ribbon. I never really have a plan when I go to make things. I just fly by the seat of my pants and hope it comes out. This time it did.
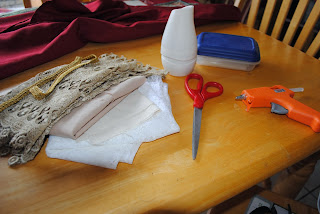
You will need the following:
Scissors
Hot Glue Gun with plenty of sticks
A used Glade Solid Air Freshener
Lace and Ribbon and Clothe
Now, when I say use a Glade Solid Air Freshener, it can definitely be a generic brand. I'm not product pushing here. The reason I used this product for my angel is because it had the right shape. I love putting these things in the bathroom.
Take the top of the air freshener off. This is the base of your angel. You can just throw that bottom part away.
I took a solid color to make the first layer. I just laid it on top of the cone and hot glued it down. It doesn't have to look pretty. It's just the first layer.
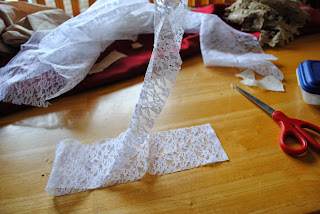
The next layer is the lace. This is a white lace that is thin enough that you can see the tan underneath. You are going to want this material to come out a little smoother. I just cut a piece out and wrapped it around. The second picture you see here is the front and the third is the back. Try and have your glued down pieces in the back.
I next cut a piece of clothe in half and rolled one have into a ball. I then wrapped the ball in the second piece of clothe making sure one side of the ball is smooth. This is the head of your angel. just glue that down on the top of the cone.
I took another piece of lace in a different color and wrapped it around the neck line so that it wouldn't look so "neck less".
For the hair, I used some kind of bordering type lace. It's kind of braided. I'm not sure what it is called. The hair placement should cover up the back of the angels head where it probably isn't so smooth looking.
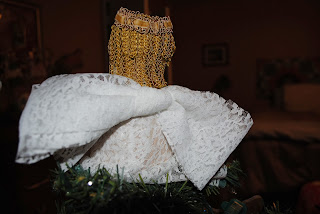
I took some lace that matched the dress and folded it into a strip and then tied it into a bow and glued it on the back. This is the wings of your angel. On my first angel I used some wired ribbon, but this time I didn't have any that would match. Either way will look very pretty.
I took a strip of this fancy gold cloth ribbon and glued it on the angels head to make a halo.
The face is very simple. I just used a sharpie marker. Press very lightly because it will easily bleed through. I basically made two little smiles for the eyes.
Here is my new angel on the tree. Front and back versions.
The cool thing about this is you can make different kinds in different ways in different colors. My first angel has arms but this one doesn't but they both look pretty good.
I hope you enjoyed this and if you make one I would love to see a picture of it.
Merry Christmas!


No comments:
Post a Comment